
Introduction
My summer time project this year is to set up some LED lights outside. After testing out a couple Govee strips that I didn't like because I couldn't diffuse the individual lights away, I finally found an LED strip I liked. The next step was to control these strips so that I could do more than solid colors or the default rainbow every LED strip has. I settled on using the amazing WLED project to control the lights. To speed up the project, I decided to get a prebuilt controller and eventually selected the Ericsity controller with a built in mic.
Side note: This post is just about how I updated the controller. The next article in the post is available, and talks about how I am controlling a larger power supply with the WLED controller.
The Problem
The controller arrived and was easy to set up. I wired up my strips in the basement to ensure I didn't have any power problems and then determined where I needed to make cuts and solder points once this was outside. Then I went to set up segments in WLED so that I could control effects in specific areas.
The problem I quickly encountered was that I am outlining my deck with these lights and right in the middle of the deck is a set of steps that I also wanted to light up and then the rest of the deck rail. WLED doesn't have the ability (at least that I've found) to span an effect across multiple segments and I'd need multiple segments for this.
At minimum I'd need 3 segments - The rail, the steps, the rest of the rail. If I want an effect to span the entire rail, I can't do that with the steps in the middle. Further research pointed me to the ability to remap the physical LED order to a logical LED order. After trying to set this up, it wasn't feature complete in 0.13, but did appear to be in 0.14.
However, the Ericsity - rightfully so - utilizes a stable version of WLED that only allows you to update to 0.13.4 and the README has the following note:
This repository is still maintained, and will receive bugfixes. However no new features will be added.
Setting up Ericsity Controller
Let's take a step back and get the controller set up and then focus on upgrading it. Fortunately, Ericsity makes this pretty easy.
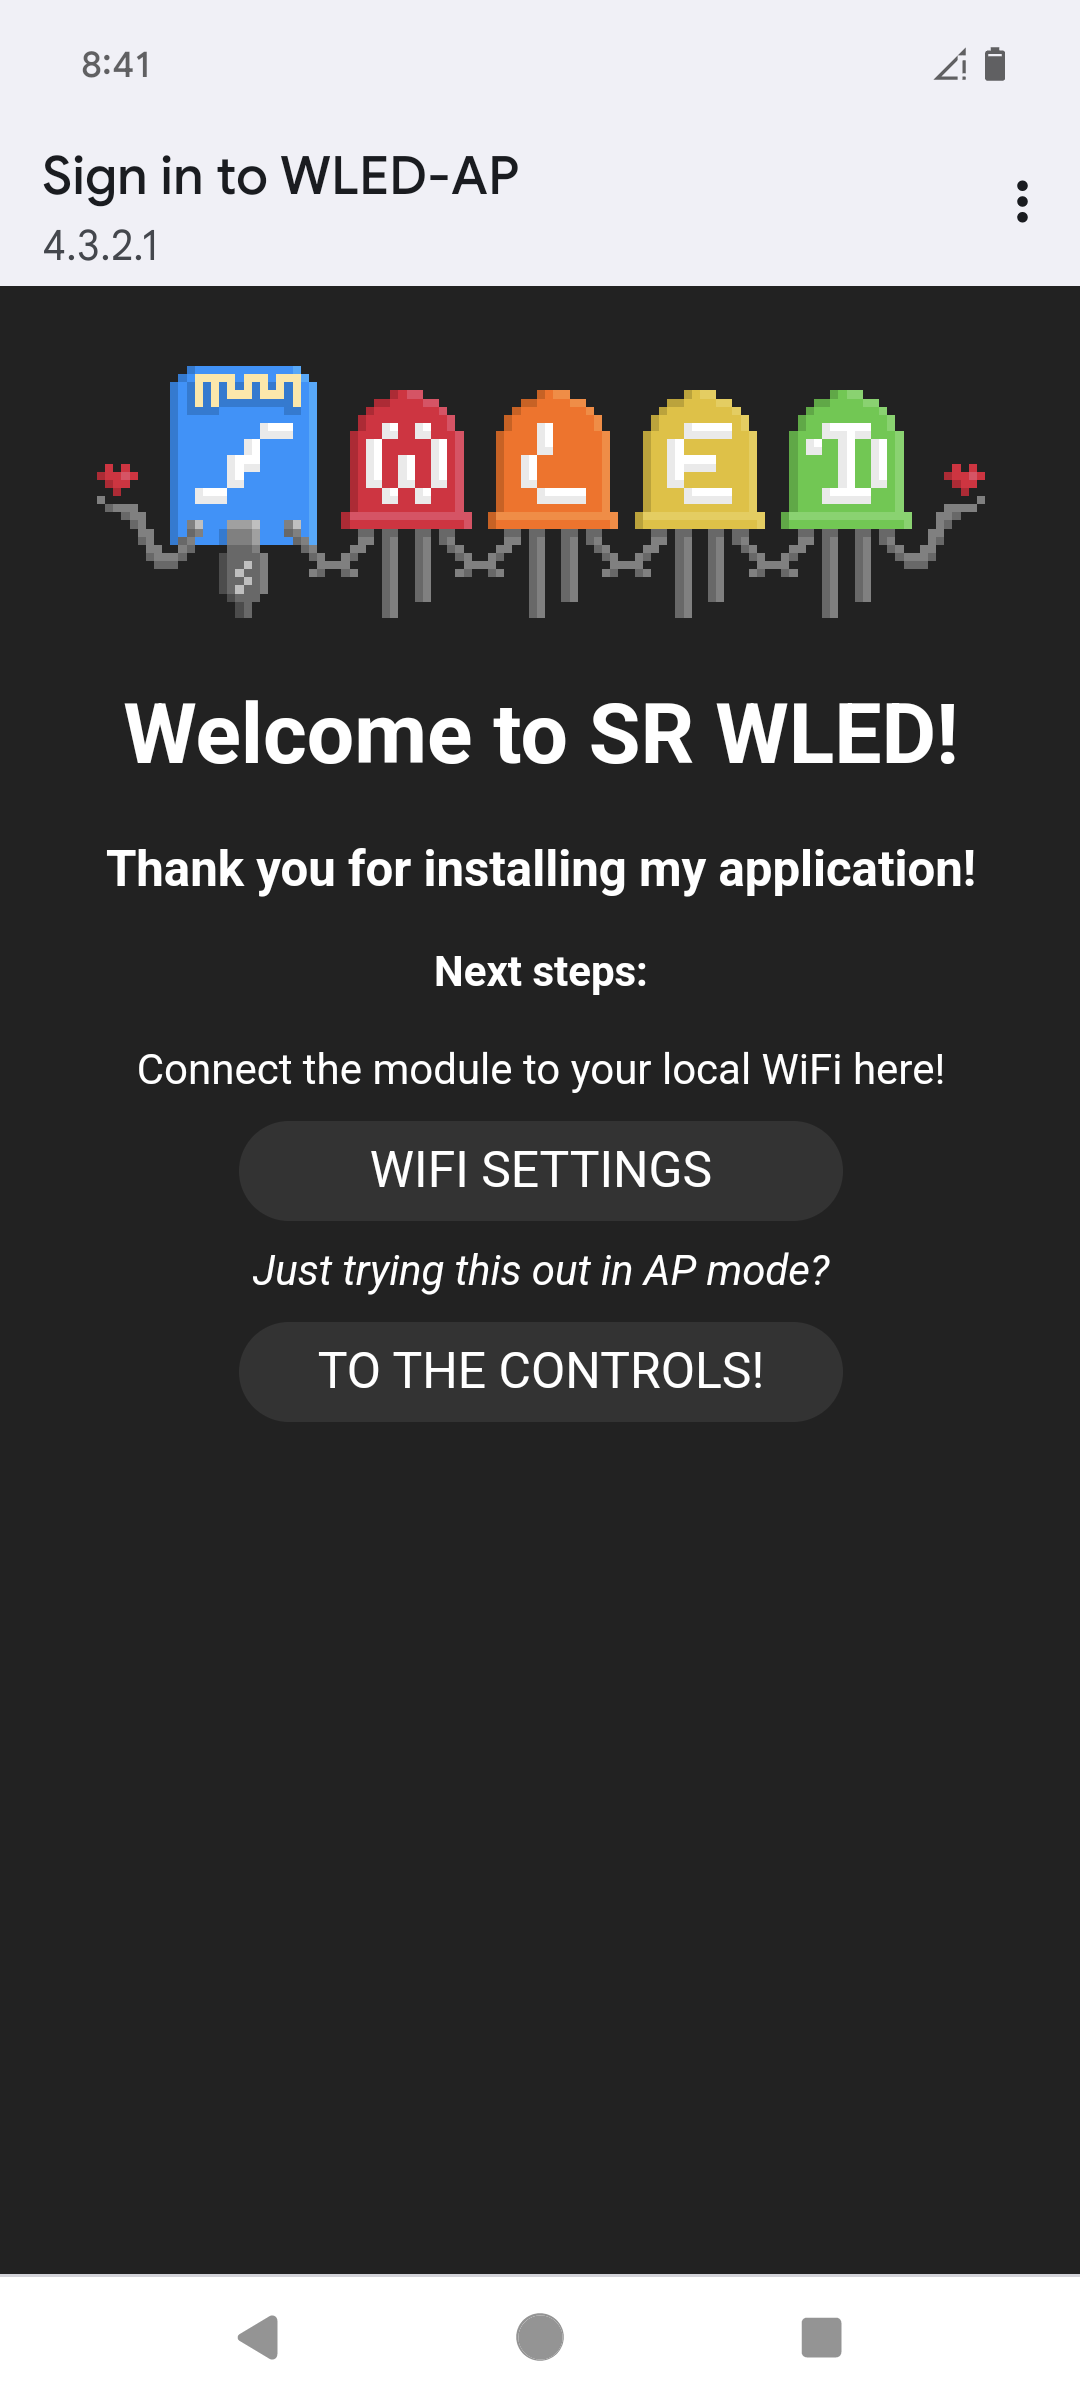
Step 1 is to plug in the controller. After a few seconds, you will see a new network available on your phone called WLED-AP. Join that network. From your browser navigate to 4.3.2.1 and select "WIFI SETTINGS".
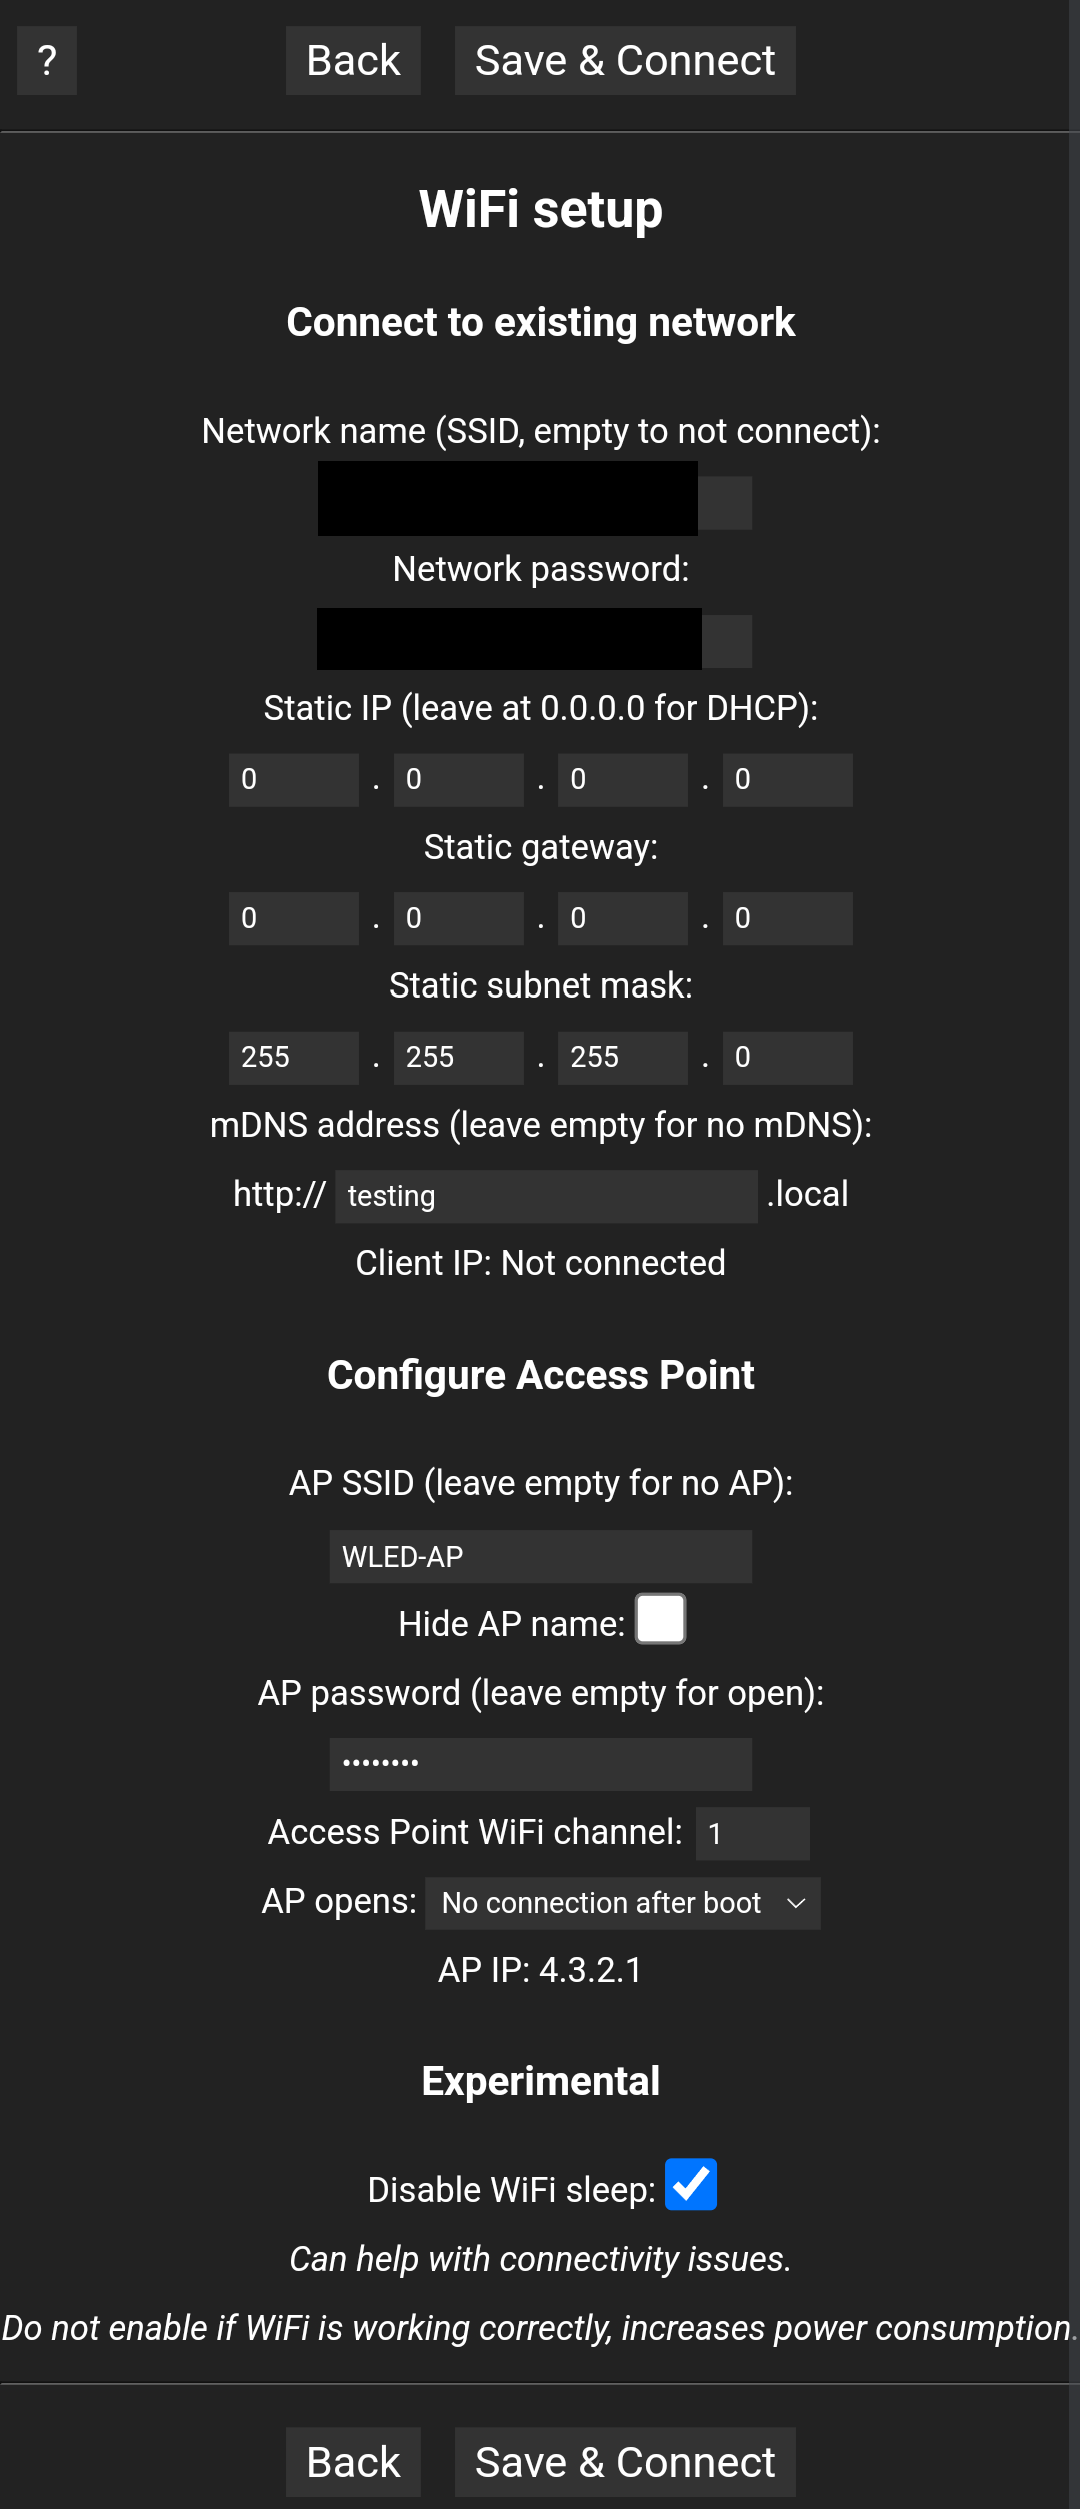
The goal is to add this controller to your wireless network. Do this by adding your network name and password into the first two text boxes. I also updated the mDNS setting, but that's optional. Then save and connect.
Finally, install the WLED mobile application if you are going to manage this via your phone. On an android device you can find it in the Google Play store with the name WLED. Reconnect to your wireless network and the one you just added the controller to. Once installed and reconnected to the network, open the application.
If you have already installed and configured a controller, you'll see your previous controllers listed. To add the new controller, click on the + sign in the upper right. Then "Start Discovery". When the controller is found, you can press the check button.
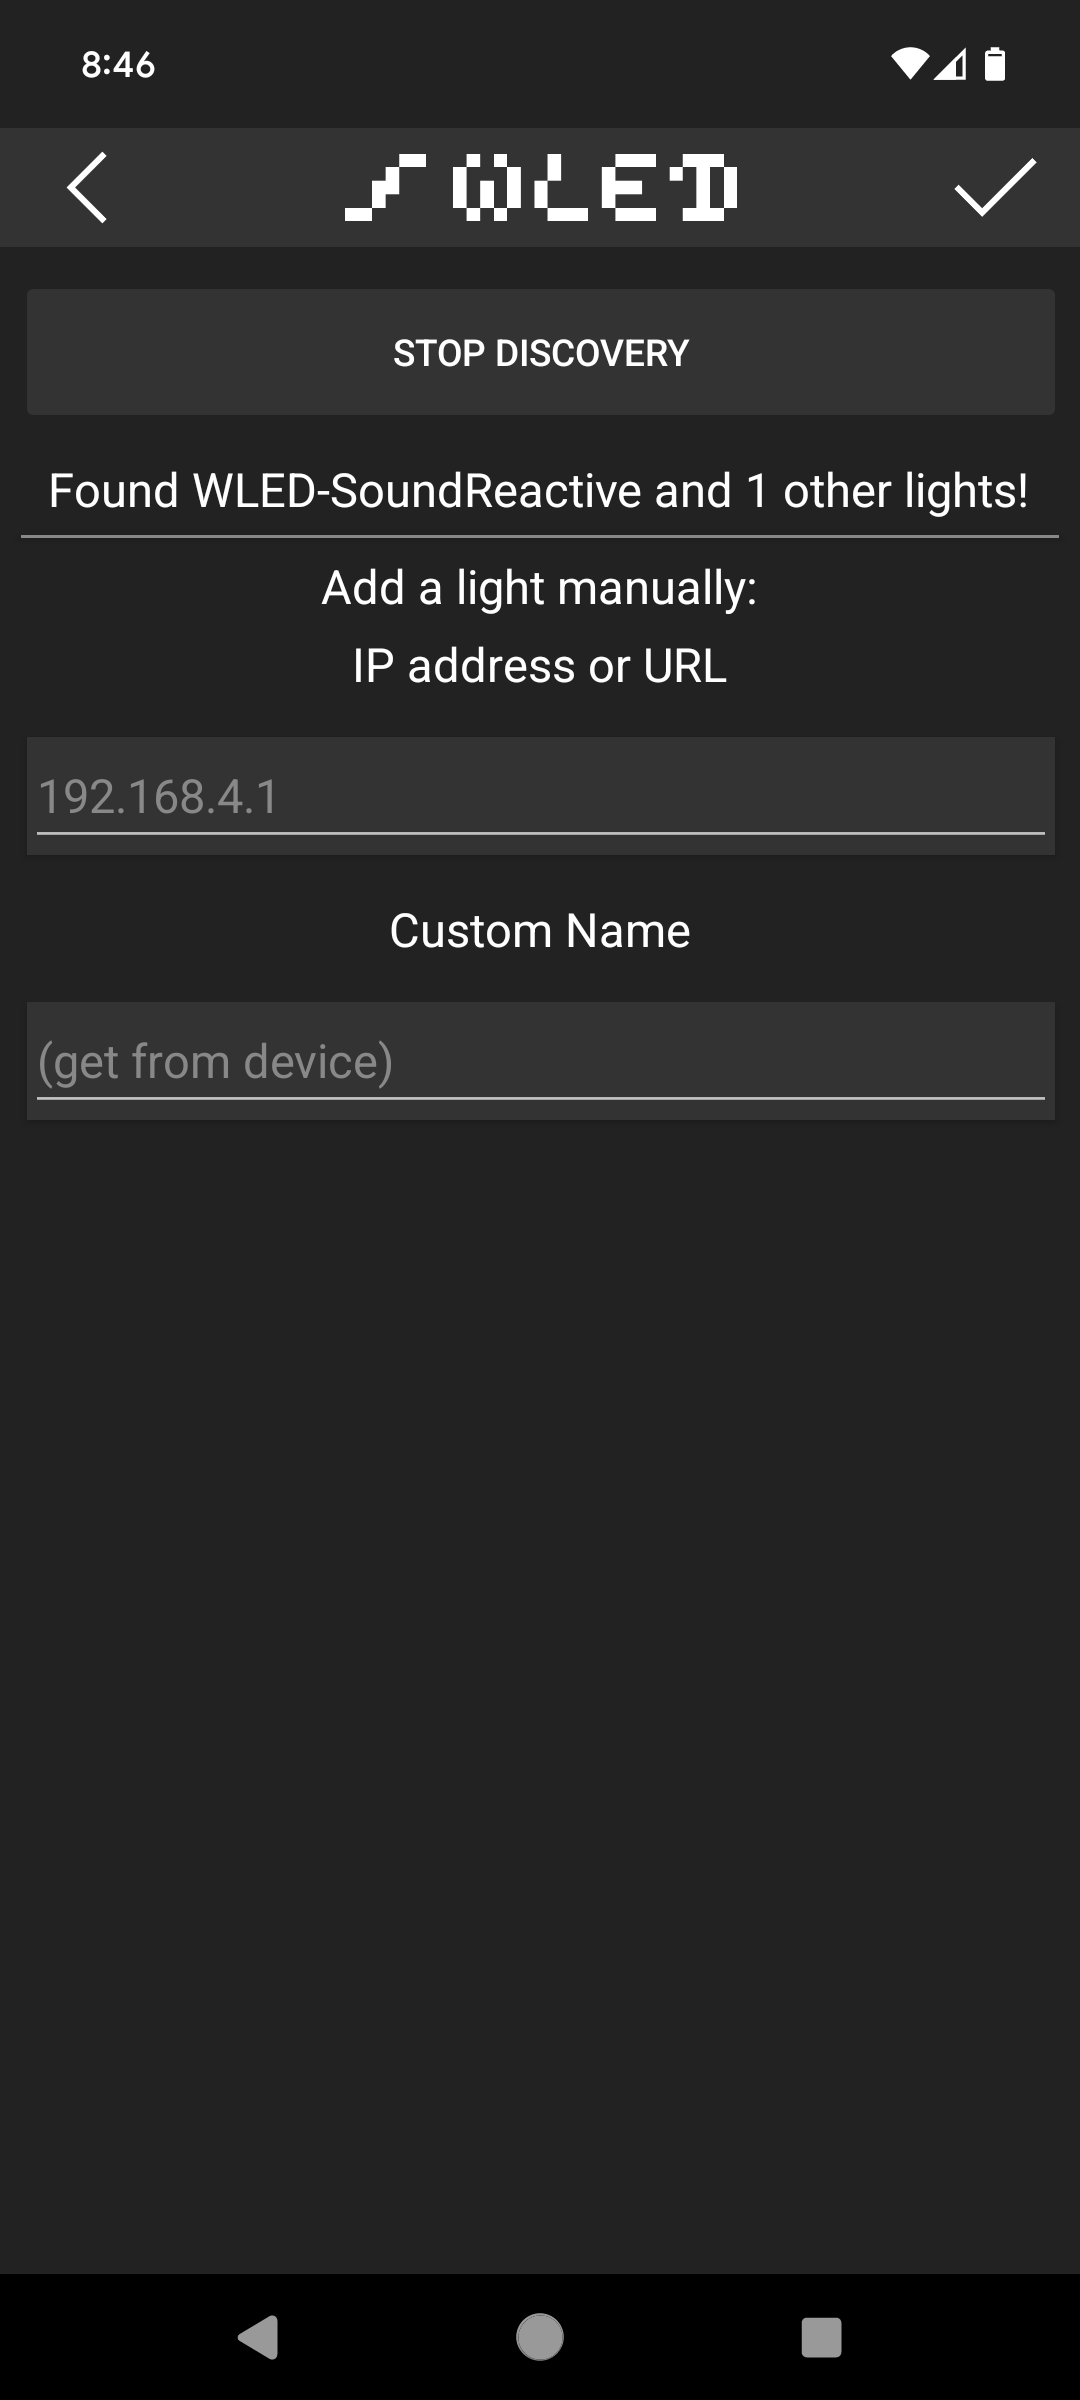
The new controller will be listed on the main WLED page with the default name of WLED-SoundReactive. Select that controller by tapping it. Then select "Config" along the top and "Security & Updates" at the bottom.
Scroll all the way down to the bottom of this page and you should see that you have the following version installed:
WLED SR version 0.13.3
Update to 0.14.x
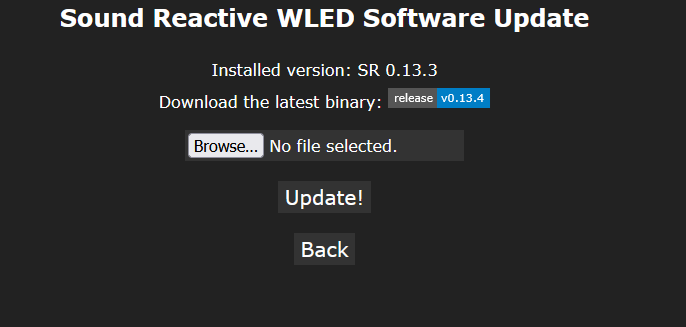
From the Security & Updates page, it makes sense to try and perform an update. If you click "Manual OTA Update" you'll notice that only version 0.13.3 is available via this link though. It's time to do a manual update!
I am utilizing the MoonModules branch because the README for the default install says that changes should be made against this branch.
Pull Requests should be created against the MoonModules mdev branch.
I performed this OTA upgrade from my computer by navigating to the mDNS I set up previously. It can also be accessed by the IP address of the controller in your browser.
At the time of this post, the current release was 0.14.1-b30. This was released approximately 6 months ago. I briefly skimmed through recent issues and pull requests to see if I should find a more recent build. There was a crash issue reported with the ripple effects. Since I like that particular effect, I decided to go with a newer build than the official release.
Official build
If you are going to stick with an official release, navigate to the release page and download the binary file you want to install. For the Ericsity, I found that the generic ESP32 build worked. If you want to use this, look for the file titled WLEDMM_0.14.1-b30.36_esp32_4MB_M.bin. You could also use the WLEDMM_0.14.1-b30.36_esp32_4MB_S.bin. Download this file.
Selecting a more recent build
Since I wanted a fix for the item I found, I opted to download a recent build of the mdev branch. This can be accomplished by navigating to the build pipeline and filtering for the mdev branch. This is on Github and available via this direct link to the mdev pipeline.
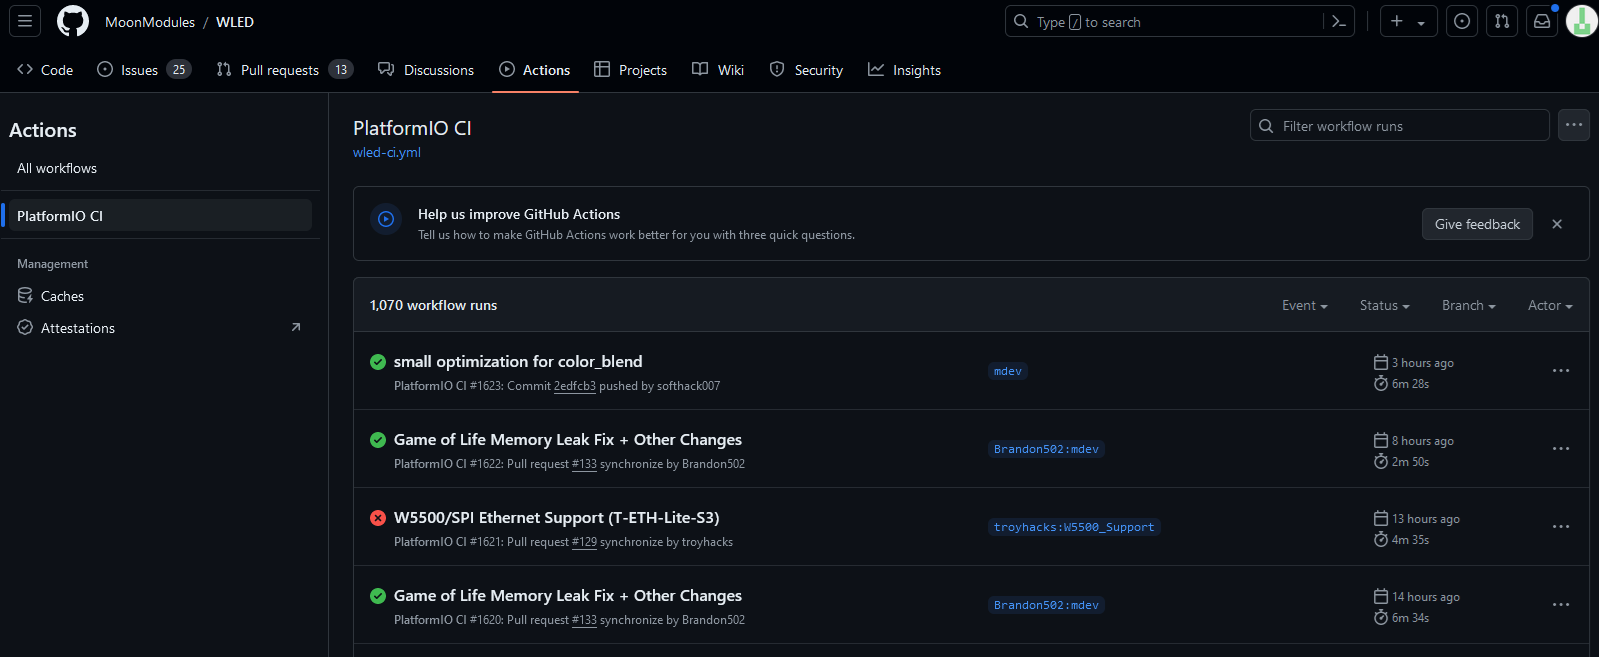
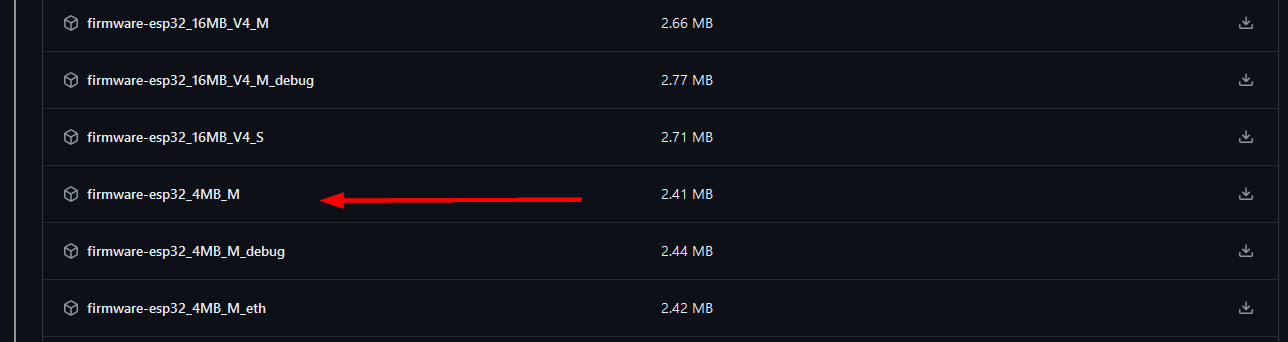
From here, select the build you want and scroll all the way to the bottom of the page. Find the binary you want to download. In my case, I wanted the firmware-esp32_4MB_M and download it. Once downloaded, extract it so that you can upload the .bin file within the WLED page.
Press the button!
In WLED's Security and Update page, select this binary and then click "Update!"
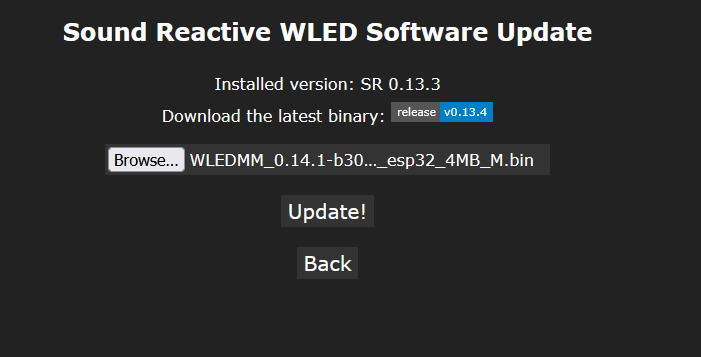
The update took less than a minute for me. While the new image was being installed, I was told not to close or refresh the page.

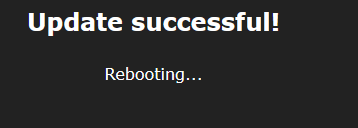
When the update is complete, the controller will reboot.
To confirm that everything has been updated, click on "Config". Immediately, you'll notice a lot more options. Scroll to the bottom and select "Security & Updates" and at the bottom you'll have an About section that lists the version you selected to install. Mine looks like this:
WLEDMM version 0.14.1-b31.38 ☾
Fixing Sound Reactive
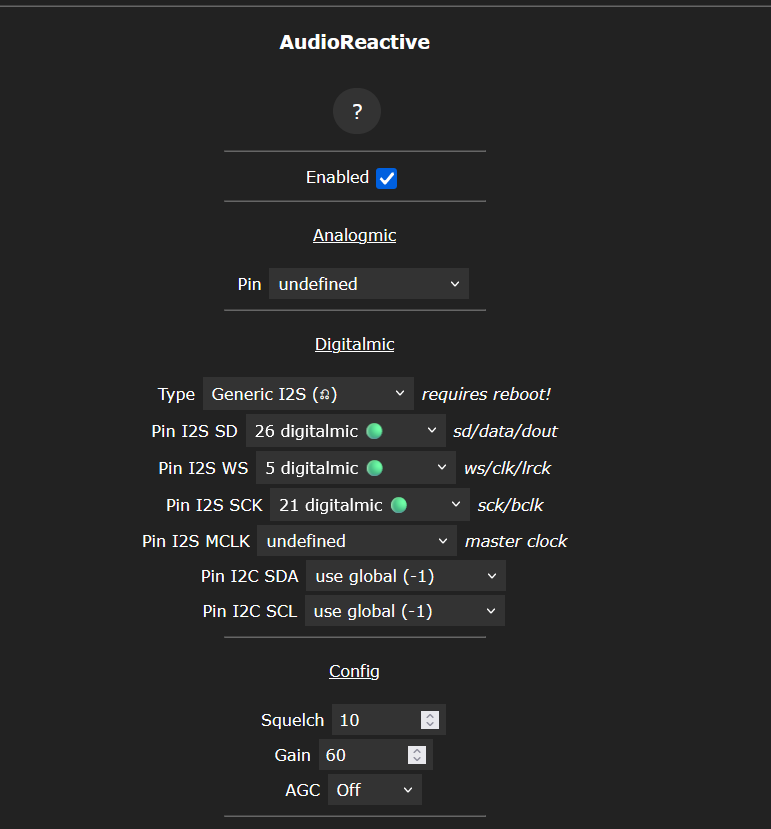
During testing, I noticed that the sound reaction wasn't working. I found the AudioReactive plugin was disabled by default. This is an easy fix. In the WLED application (or web page), click on "Info" then click the power button icon next to "AudioReactive". However, this isn't enough to solve the problem. Click on "Config" then scroll down to AudioReactive. First make sure it is enabled (it should be after the power button selection above).
The digitalmic section needs to be modified. The Ericsity controller has the microphone on the following pins:
- Microphone Type: Generic I2S
- Pin I2S SD: 26
- Pin I2S WS: 5
- Pin I2S SCK: 21
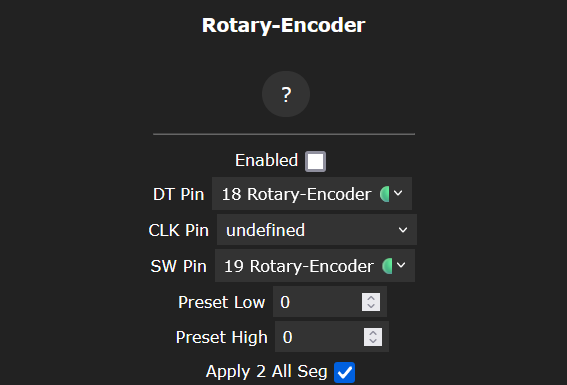
I found that pin 5 was selected for another plugin. If you find this too, navigate back to Config page and select "Rotary-Encoder". I don't utilize this plugin, but it is part of the M build I downloaded. Disable the plugin and change the CLK Pin to be undefined. Then save this change and go back to the AudioReactive plugin and set it up with the pin layout above.
Finally, reboot the controller by selecting "Info" and rebooting the controller at the bottom.
Good to go
Now that the controller has rebooted, audio reactions are working again. The branch I've updated my controller to is actively maintained for the 0.14 branch, even if it is several months behind the main line. I'm satisfied with this for now and will begin experimenting with the led mappings that I need that started this entire upgrade process.