
Introduction
I take a lot of notes. About five years ago I switched from utilizing notebooks, because I was going through them so quickly, to a Rocket Book. This feels very similar to a notebook, with the benefit that it is reusable. It also has an application that allows me to quickly scan a page and save it to one of several locations. It's very handy. The downside is that the OCR isn't perfect (oooor, my handwriting is bad) and the annoyance of cleaning the pages every week or so. I've found that if I don't let the pages dry completely, then the next time I go to use that page it has a fine film over it that makes writing a little more difficult. Think writing with a pen that is low on ink.
I discovered Obsidian a while ago. I've put a little bit of effort into utilizing it, but more recently I've committed to utilizing it more. The idea of all digital notes is enticing. Over time I'll see if it's helpful.
But, like anyone with multiple devices, I want my Obsidian vault on all devices. What if I have a thought while I'm away from my main computer? One option is to utilize the Obsidian Sync feature. It's got end to end encryption, version history and a monthly subscription fee. I can build something using my existing GitLab installation without that monthly subscription fee. Plus, since I'm the only user of this, I'm ok with a little trade off that a full service provides.
Repository Setup
GitLab
Within GitLab set up a new project by clicking on "New Project" in the upper right.

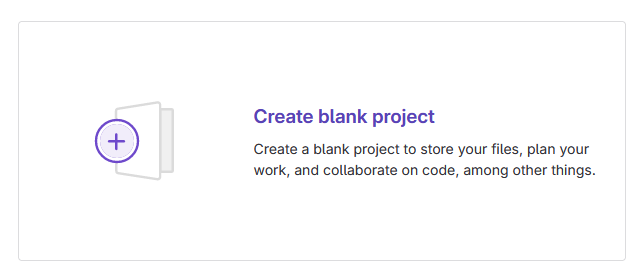
Select the option to create a new blank project.
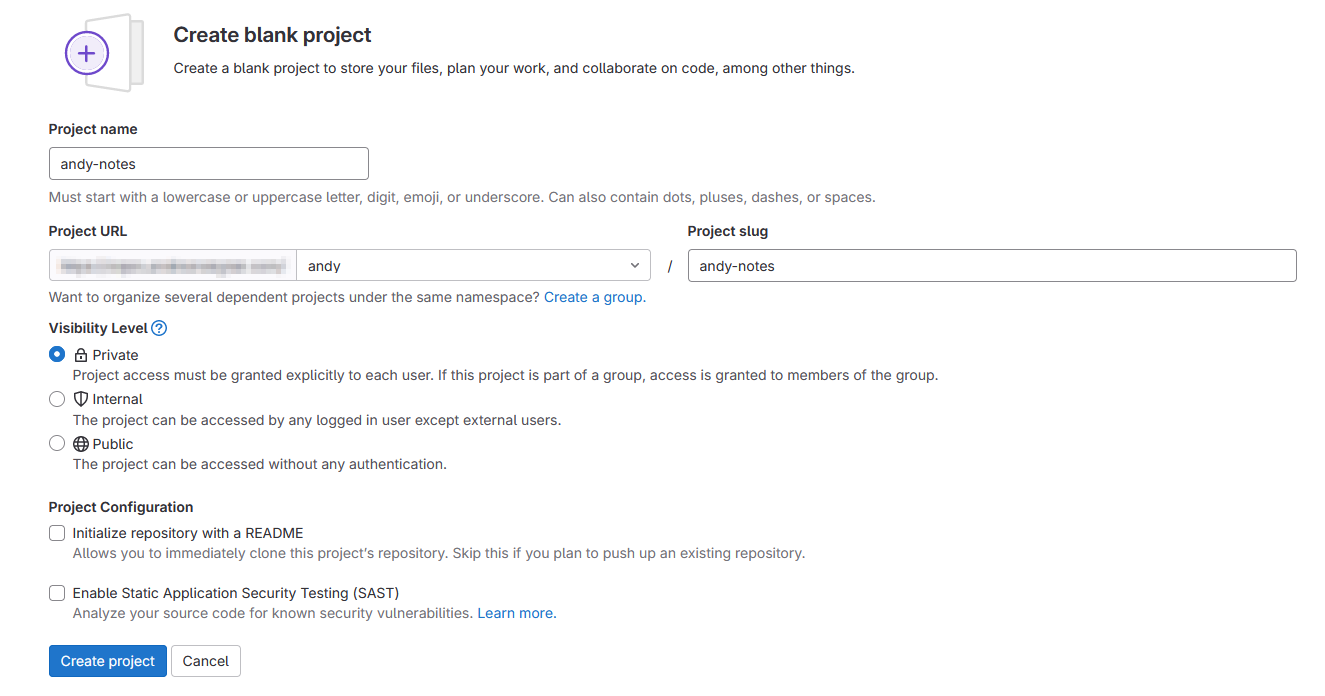
Now we need to set up the project details. Select a name that is meaningful for you. I've utilized andy-notes in the screenshot below. I also created this without a README, because I'll generate the initial repository in a moment and push it up to the server.
Repository Initialization
This set of steps only has to occur once. All devices will be able to start with the next section.
Open the command prompt or terminal (depending on what your operating system calls the system console). Navigate to the location you want your notes to be stored. In my case, I created a new directory to match the name of my repository. I then created a .gitignore with the following content in the directory.
.obsidian/*
!.obsidian/app.json
!.obsidian/appearance.json
!.obsidian/config
!.obsidian/community-plugins.json
!.obsidian/core-plugins.json
!.obsidian/graph.json
!.obsidian/hotkeys.json
This should ignore the majority of the .obsidian hidden directory between my devices, but keep a few key items. I may update this over time, but for now this is working well.
Now, initialize the repository.
cd andy-notes
git init --initial-branch=main
git remote add origin git@<my.server.url>:andy/andy-notes.git
git add .
git commit -m "Initial Commit"
git push --set-upstream origin main
We're ready to start utilizing Obsidian and GitLab!
Obsidian Setup
First Open
Now that the backend repository is set up and it's been initially configured, all instances of Obsidian can utilize these sets of steps to start working.
If this is not the device you initialized the repository on, you need to perform an initial pull of the repository to this device so that it is a local folder.
git clone git@<my.server.url>:andy/andy-notes.git
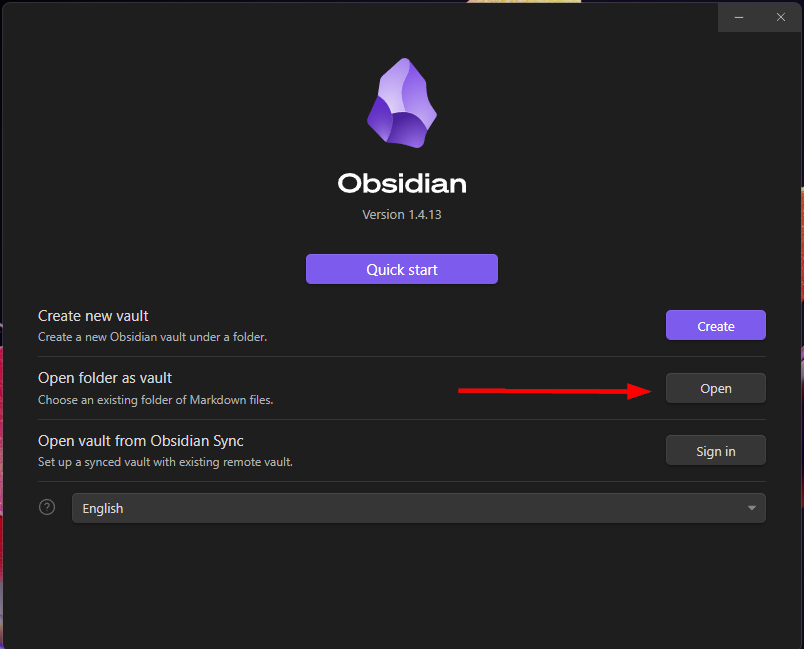
Open Obsidian. Since this is the first time you are opening it, you'll be asked to select where your vault is stored. You want to select the "Open folder as vault" option.
Select the location that your repository has been cloned into.
Enable Plugins
Obsidian has support for community built plugins. There are plugins to do all kinds of things to improve your writing and note taking. I encourage the reader to look through or search for plugins that may help you. We, however, need one specific one to accomplish our goal of syncing the vault over to GitLab.
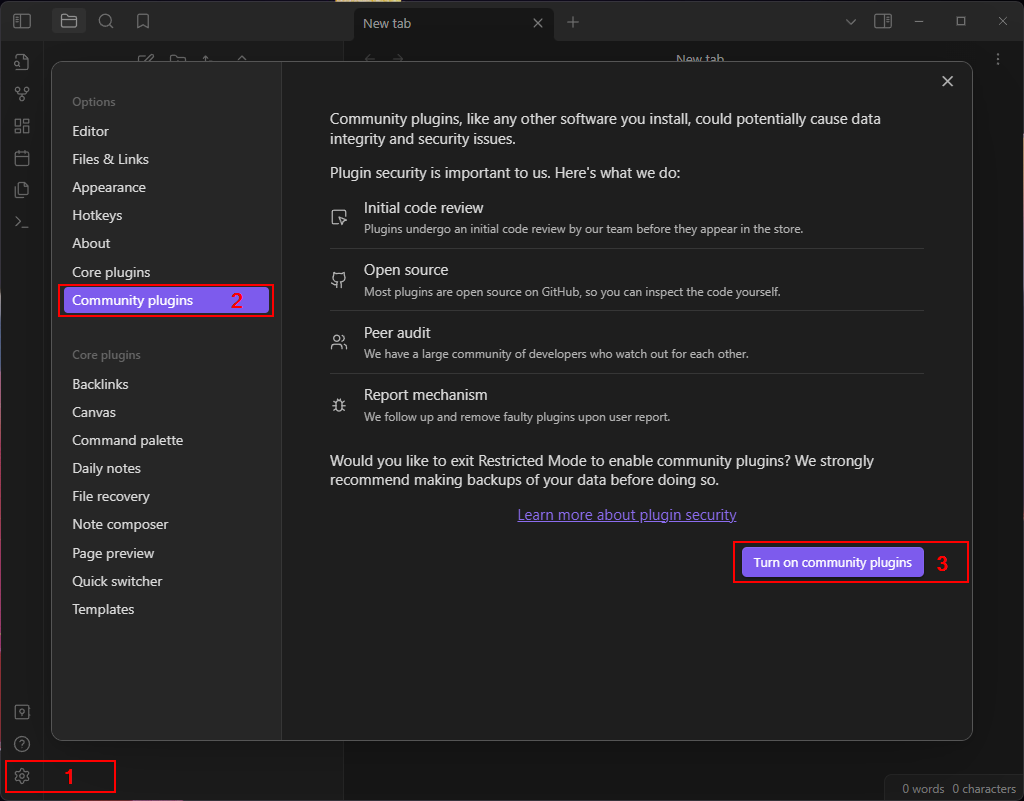
To install community plugins we need to enable this feature. In the lower left of the workspace, click the gears icon. Then click on "Community plugins", and finally "Turn on community plugins"
With this enabled, you can now browse the community plugins. To do so, click the browse button.

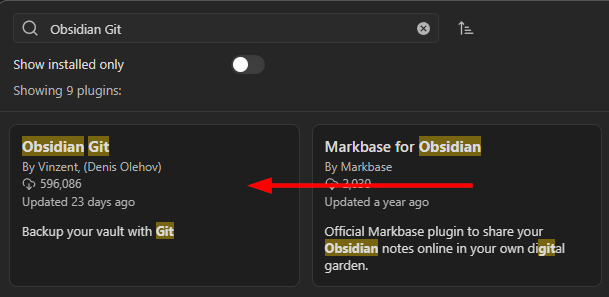
Search for Obsidian Git. While writing this, it was the first result. You should be looking for the one by Vinzent. Click on the card to pull up plugin details and potential actions.
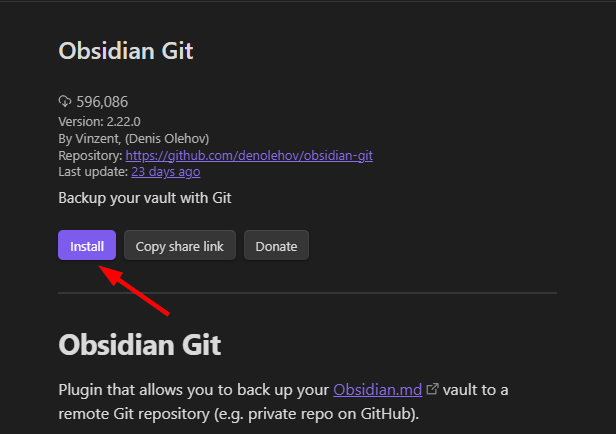
Then click "Install". The installation process should only take a moment or two.
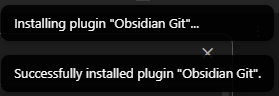
You'll receive a confirmation in the upper right if the install is successful.
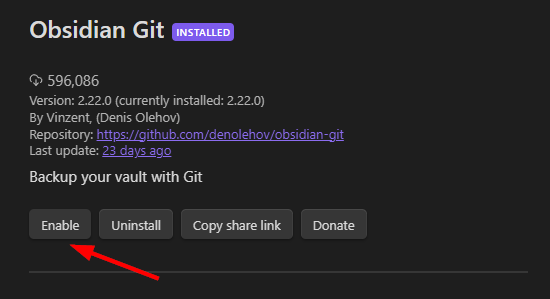
Finally, enable the new plugin. The previous "install" button has changed to be "Enable". Click that.
Configure Obsidian Git
With the Obsidian Git plugin installed, it's time to configure it. There are a few quick settings to fill out. First, you need to click the "Options" button.
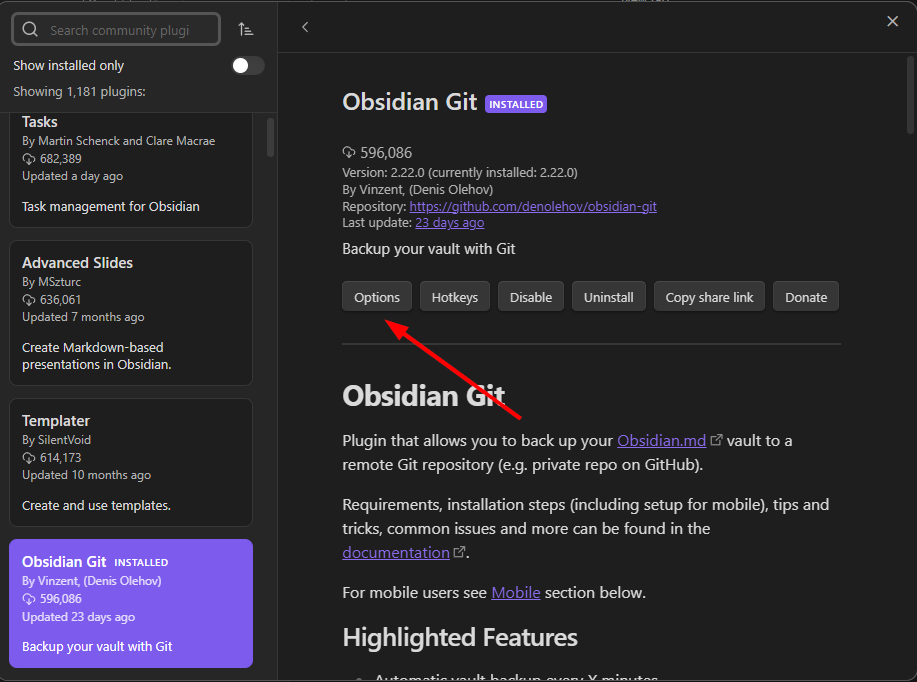
The first setting to change is how often you want the backup to GitLab to occur. This automatic back up is disabled by default. I set mine to be every 5 minutes.

Next, enable Pull updates on startup so that the instance of Obsidian that is running is always up to date. Your notes from other devices will be synchronized when Obsidian launches and you can get right back to writing.

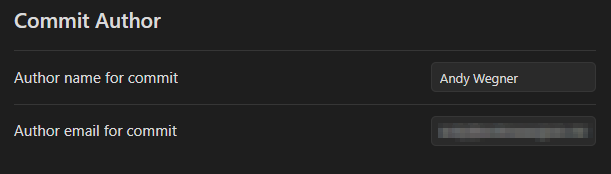
Be sure to add the Author name and email address. This is the information that will be sent on each commit.
I also adjusted the autocommit message to include the hostname of the device performing the commit. I have been going back and forth on whether this is important enough for me to keep since I'm the only one that utilizes this vault. But, if you want to adjust the messages there are two instances where the commit message can be modified.
Results
After performing the steps above, this instance of Obsidian is ready to utilize GitLab to sync your vault for free. Each new instance only needs to have the Obsidian Git plugin installed, enabled and configured.
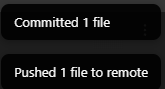
After you've configured your instance, when you open Obsidian the plugin will pull changes from the repository and let you know that everything has been updated.

Then on a scheduled basis - 5 minutes in my case - it will commit and push changes to GitLab.
In GitLab, this commit should show up immediately.

Conclusion
I now have Obsidian set up on my main devices. I've enjoyed the ability to have my notes available as soon as I open the application. Overall, this was pretty easy to set up. It seems like a lot of steps, but the one time setup makes it much longer than installing and configuring a plugin for each new instance actually takes.
I'm trying to keep my notes digital and I'm hopeful that this new set up will help. I can move between computers for personal projects instead of wondering what I had found in my research because I left it on another tab on another machine and forgot to put it with the rest of my notes. Now, it just happens.