My first experiences with a laser cutter
Posted on Thu 02 January 2025 in Side Activities
Introduction
My local library spent a lot of time and money remodeling the last few years. Part of this remodel was adding an Innovation Lab with different tools that the public can utilize. These include a Cricut cutter, a Glowforge, a couple 3D printers, sewing machines, a T-shirt screen printer, and a few others I can't recall off hand. I am excited to try out several of these, but started with the laser cutter, because I have a home project that needs a few small things cut and engraved that I wasn't sure how I was going to do.
The end goal is to get a set of two inch by one inch rectangles with various years engraved, scored or cut so that I can use these as labels.
A simple start
After a bit of research, I found that what I wanted was relatively simple - at least compared to what the machine is able to do. To do more advanced things, I'd have to learn a lot more about how some software tools operate. For my project though, I used Inkscape. I started by setting up the rectangle I wanted to use, rounding the corners, and adding a year to engrave. This became my basic template, to ensure that everything was the same size.
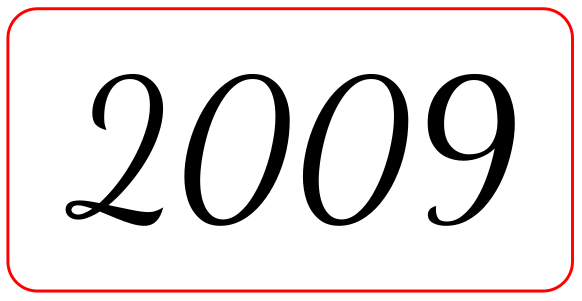
In all of my SVG files, I only used three colors:
- Red for cuts
- Black for engrave
- Blue for scoring
While I read the Glowforge can handle different colors, I noticed that other tooling and software could not and used these three colors. If I ever get access to another laser cutter - or buy one of my own - I don't want to have to redo all of my work.
The important thing at this step was to select the text, then Text->Object to path. Without this step, the Glowforge application didn't see the text, just the rectangle.
Getting Fancy
Once I had a basic cut done on basswood proof grade material from Glowforge, I wanted to try a few other designs. All of my examples below are using 2009, because that's the set I grabbed when taking pictures.
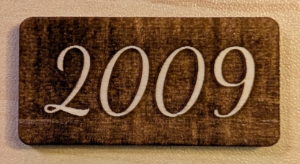
With this, I engraved the background, instead of the text, so that the year would pop out. I didn't end up liking this one very much, because it makes the material so much thinner. This is obvious when I had multiple tiles of years that had not all been engraved this way. The thinness made these specific tiles feel flimsy. Since I didn't want to use this pattern for all years for the project, it wasn't going to work for only a couple.
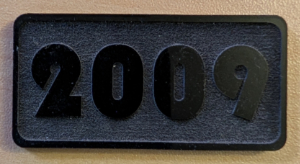
I tried a couple acrylic colors - Black and Blue - to see how it'd look. In this test, I wanted to deal with the thinness I mentioned above too. I did this by adding a small border around the outside, so that when the tiles were side by side, the outer edges were all the same thickness. I liked how this looked and would end up using a portion of this in some final designs. The black acrylic turned out well.
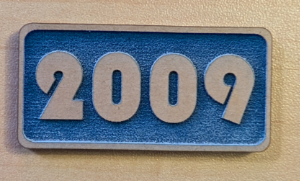
Unfortunately, I didn't like the blue acrylic. This is how blue looks with the masking tape still in place. This tape is is to prevent scorching marks. It looks ok with the tape in place, but once removed, the blue text just kind of got lost.
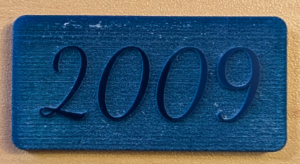
This test didn't have the outer border, but I don't think that would have helped me like it any better. The blue text just gets lost from any angle other than straight on.
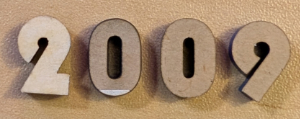
I cut out individual numbers as well. These look really good. Unfortunately, I didn't plan beyond the cut out, and dealing with four individual numerals on each item I wanted to label very quickly became a ton of work to ensure they were unmasked, aligned, and glued into place. They also didn't end up looking as good as the tiled items once I had them in place.
Something I should have learned from this experiment that I was vaguely aware of, but didn't pay attention to because I was focused on the numbers themselves, was that the inner part of the numbers would come out. This was more important in the next two experiments.
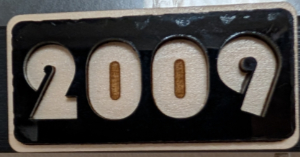
At this point I had decided that I liked how the black acrylic looked, but wanted to highlight a few years. I attempted one last test to see if I could utilize the narrower engraved look and stack it on top of another. The original goal had been to end up with the same thickness as the other tiles, but that didn't work as planned.
That said, for the few years that I needed to highlight, this worked very well. To build this, I kept the lower layer - the wood - the same size as other tiles. I engraved like I had done for the acrylic tests above. Then on the acrylic itself, I made it the size of the inner border and reversed the numerals. I did this because I originally tested by engraving the acrylic down to size too, but it didn't look good. Instead, I kept the acrylic the original width and just cut out the numbers.
Once stacked and glued together, I realized that I hadn't kept the inner pieces of the zeros. It is easy enough to go cut out a couple more numbers at the library, but at the same time, not bothering me enough to do so.
Conclusion
Over the holidays, I completed the project and got everything labeled. I'm pleased with how it turned out. I was not surprised at how easy the Glowforge itself is to use. Learning how to design the SVG cut files took longer than I expected. There are likely other software tools that could do the job better, but for this small project and for some experiments, Inkscape worked just fine.
For my next project, I'd like to finish off the WLED work I did last summer. The original project didn't work as expected, but the WLED portion worked wonderfully. I could build a couple stand lights and laser cut out the base. I'd have to figure out how to model the aluminium rail to cut it correctly, but that sound like a fun task.